
Multi Vendor
Turn your website into a marketplace with multiple vendors and start earning from their sales.
- Downloads
- 389
- Latest version
- v4.0.2
- Supported version
- v3.x and v4.x
Introduction
The TastyIgniter Multi Vendor extension allows you to create a marketplace where multiple vendors can sell their menu items. This extension is ideal for businesses looking to expand their offerings by allowing various vendors to join and sell through a single platform.
Features
- Allows multiple vendors to sell their menu items on a single platform
- Vendors can manage their own menu items, locations, orders and reservations
- Vendors can set their own branding and logo to customize their menus and table booking pages
- Vendors can register and create their own accounts
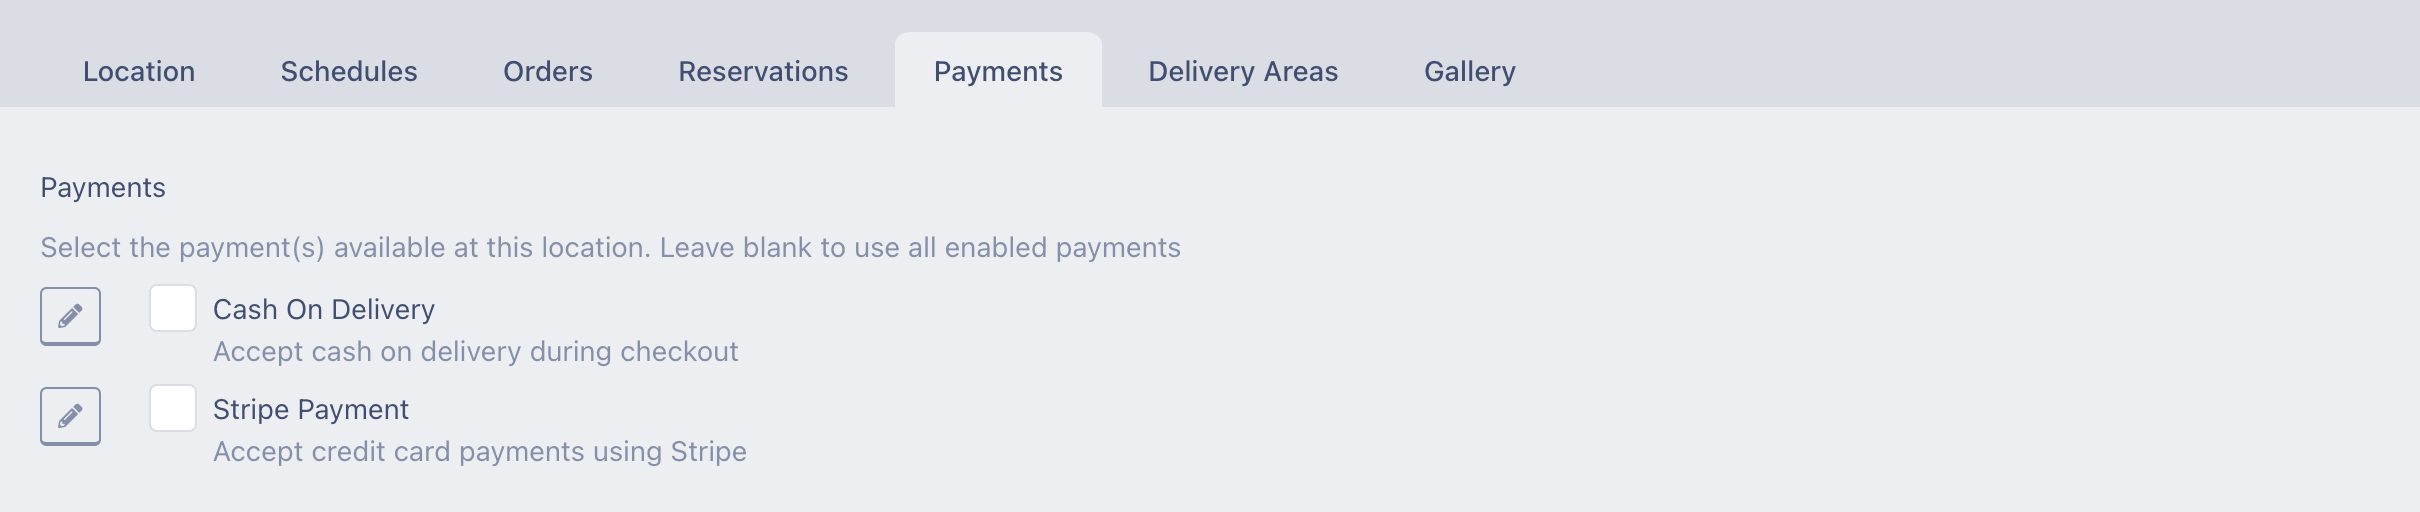
- Vendors can set their own payment preferences
- Admin can approve or reject vendor registrations
- Admin can limit the number of resources (such as menu items or locations) a vendor can create
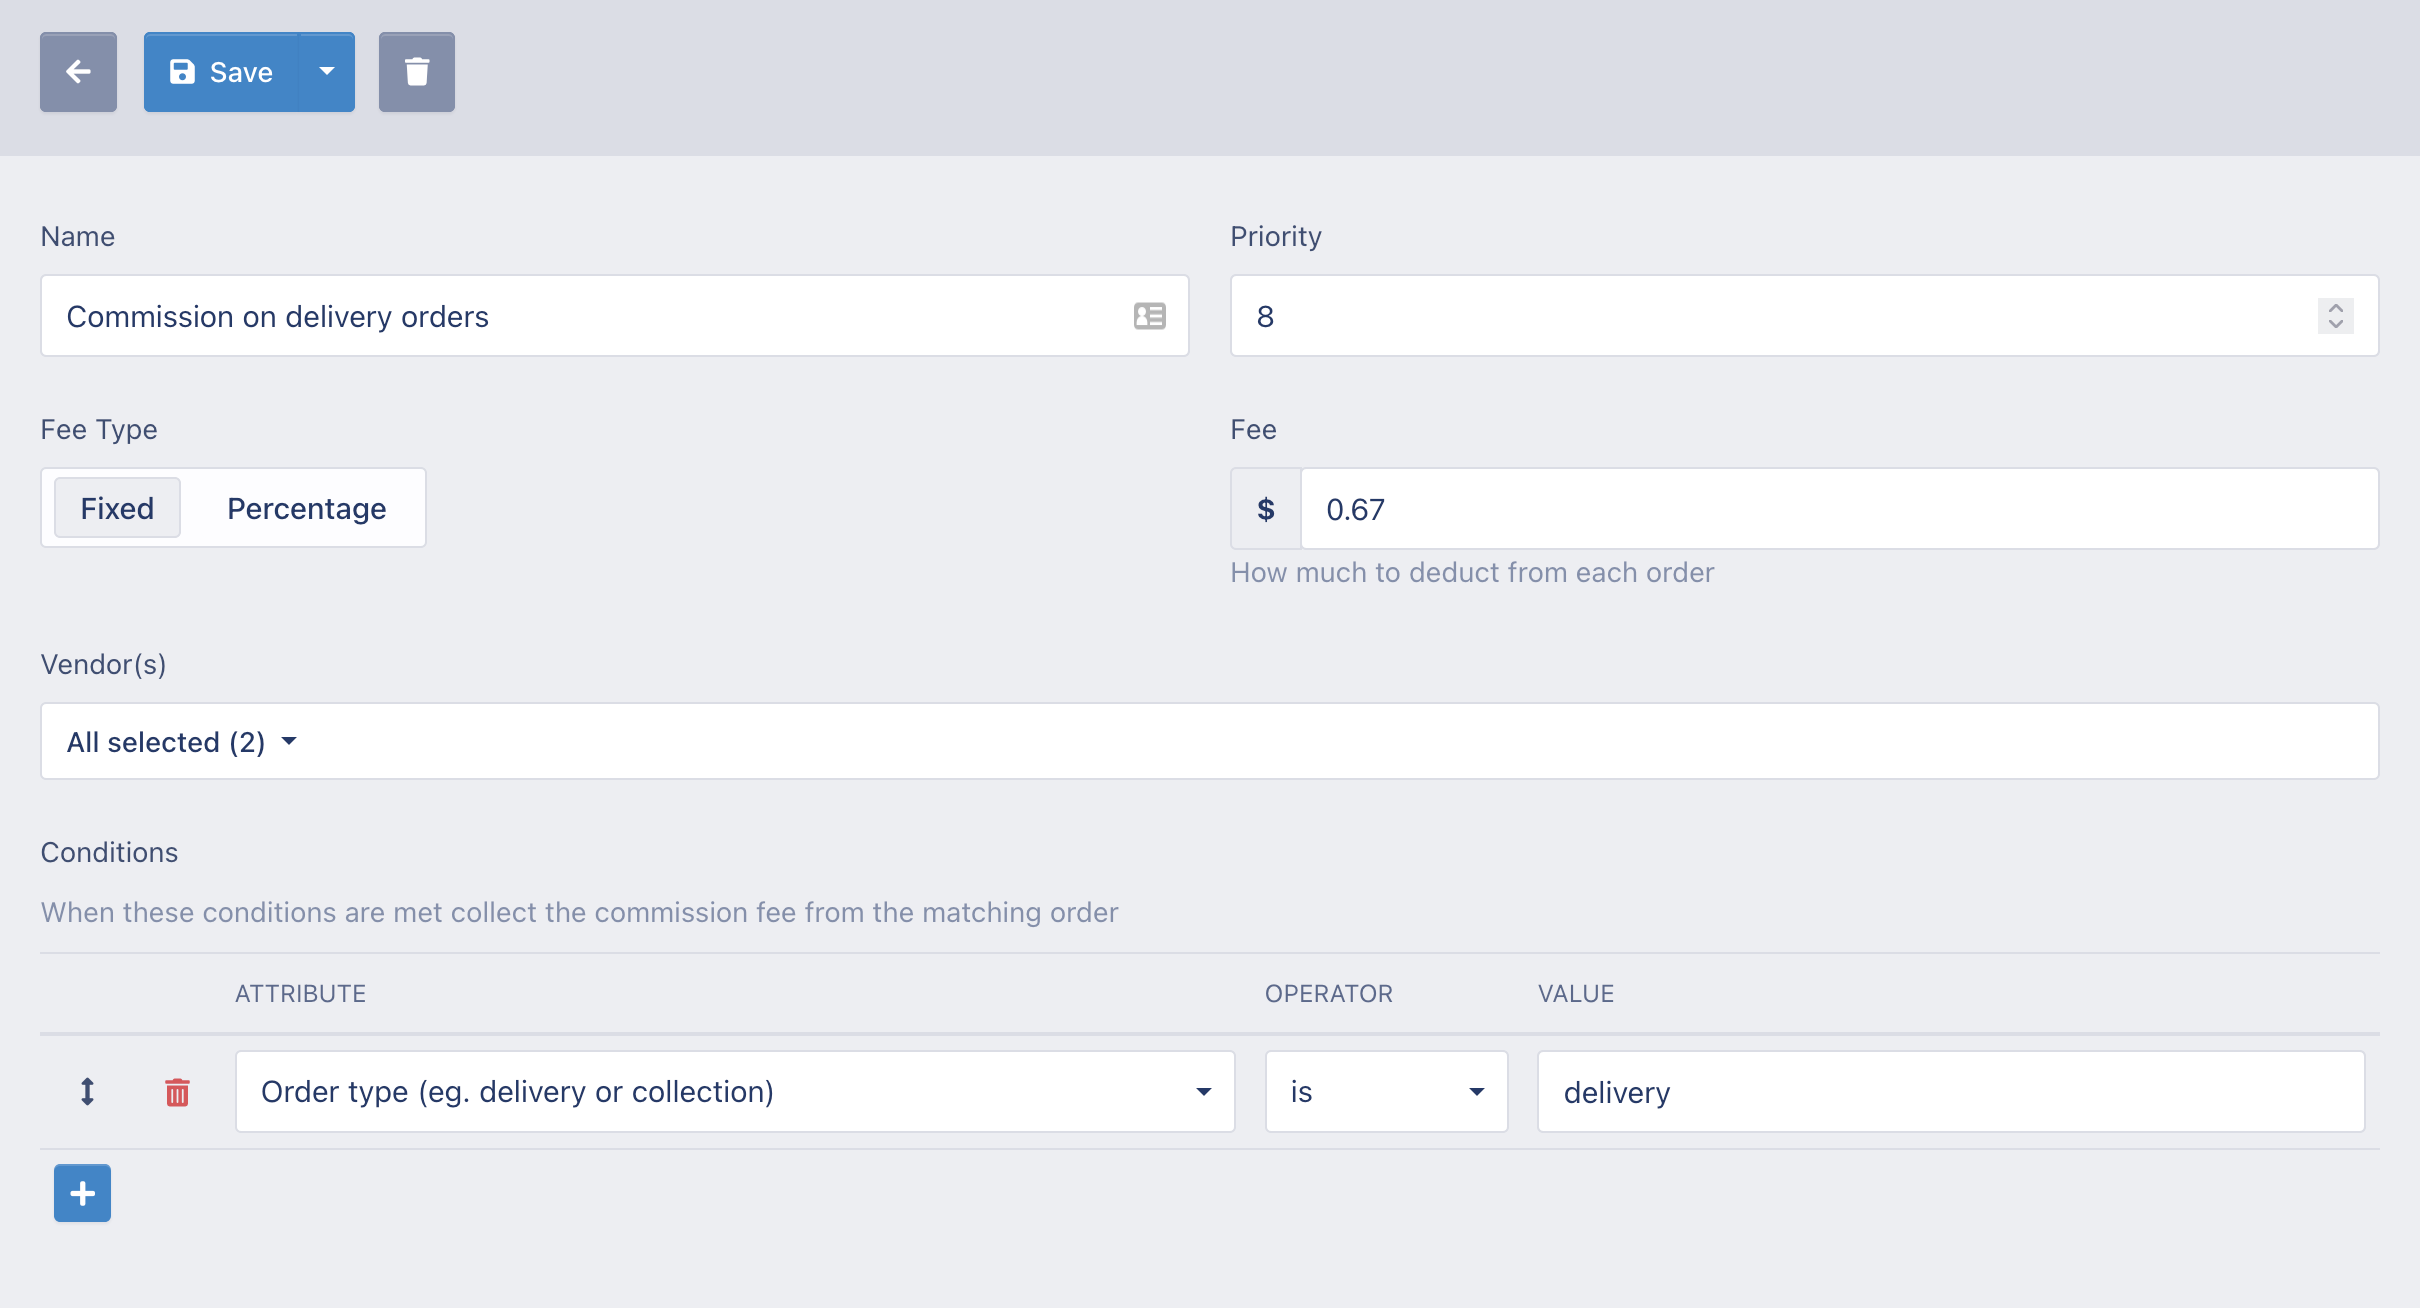
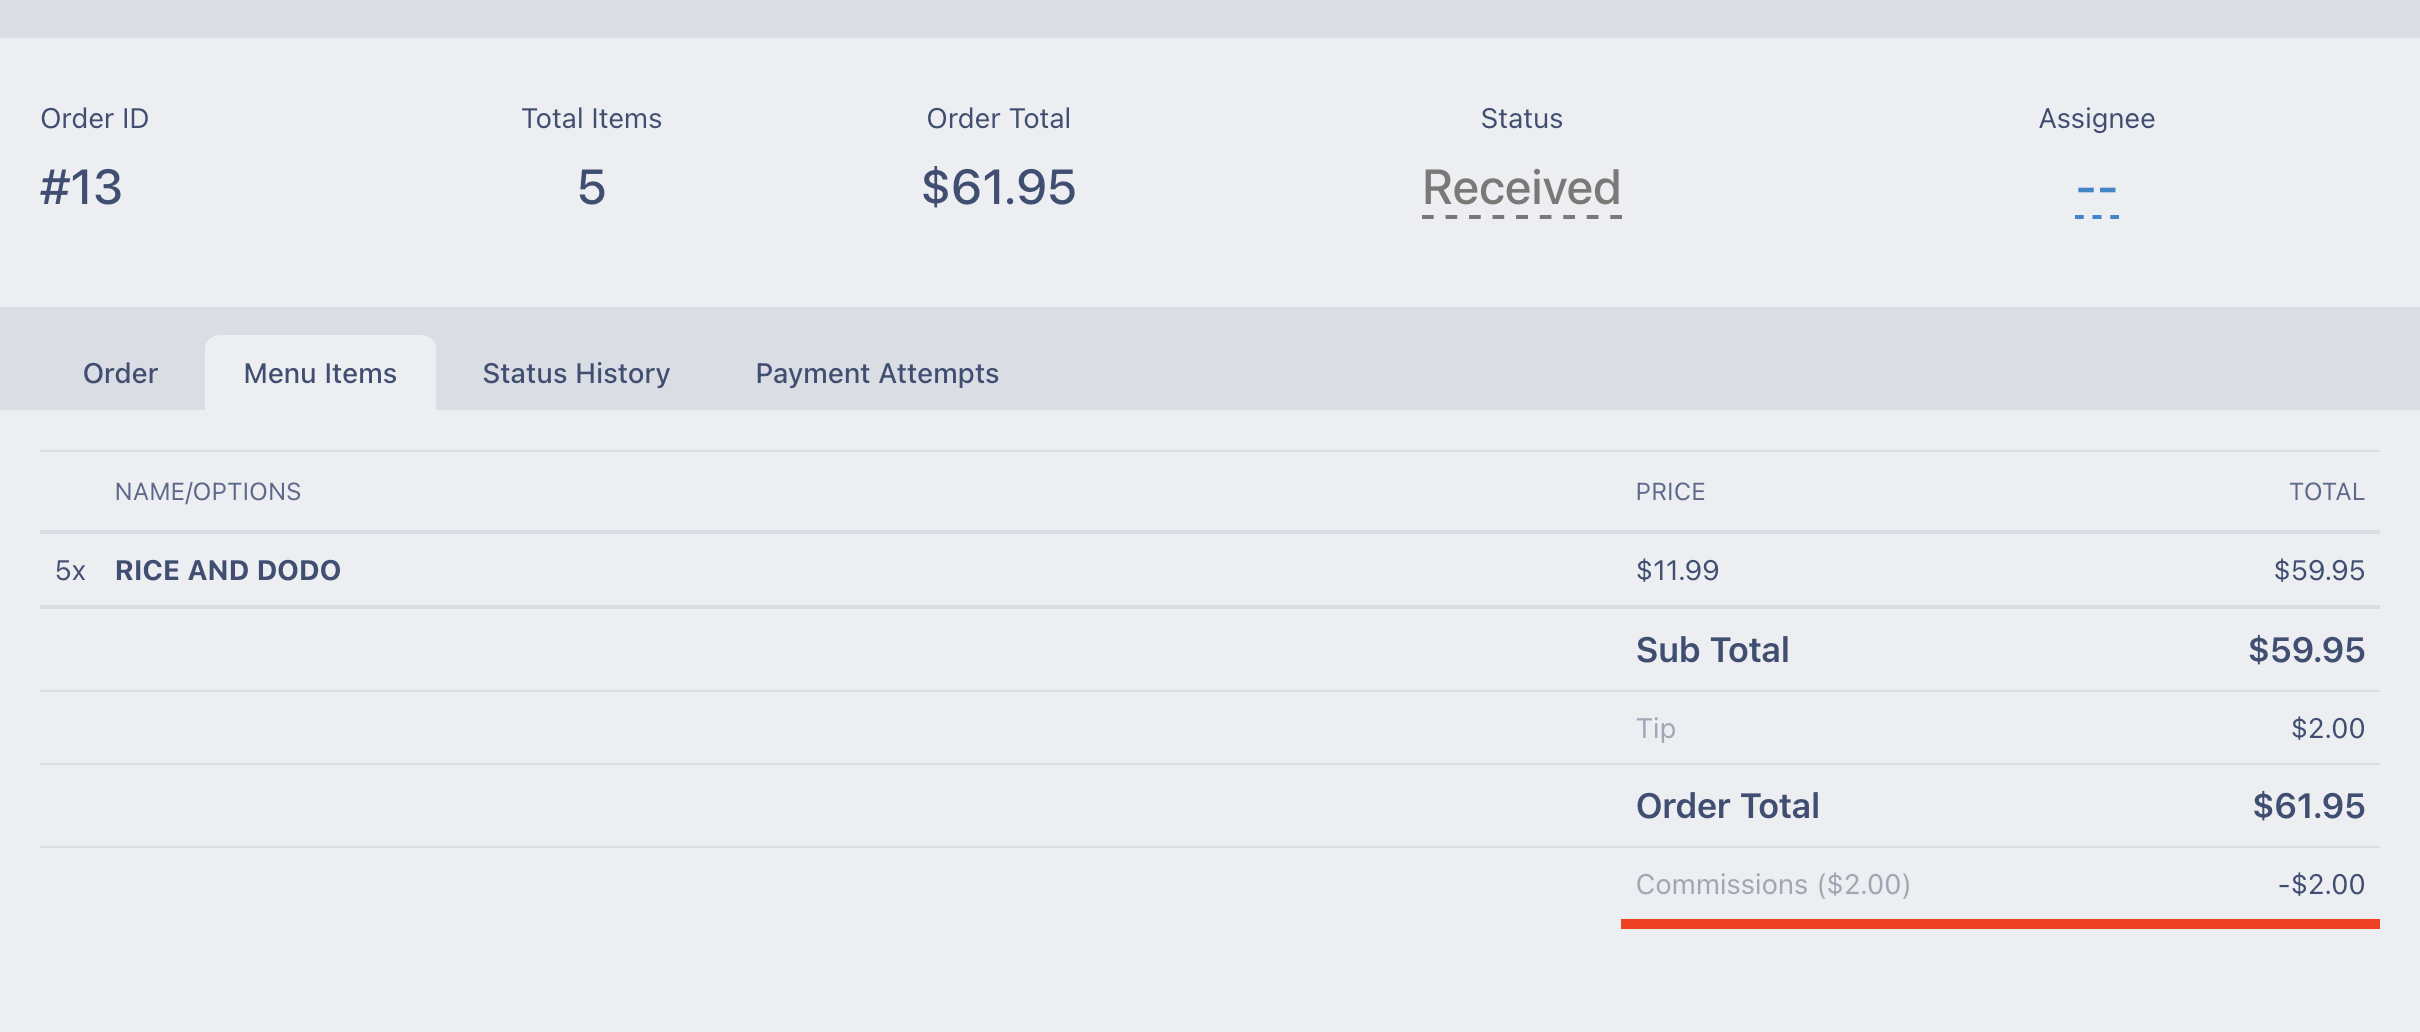
- Commission rules can be set to determine how much commission (such as percentage or a fixed amount) is taken from vendor sales
- Payout vendors automatically with Multi Vendor Stripe Connect
Documentation
More documentation can be found on here.
Security vulnerabilities
For reporting security vulnerabilities, please send an e-mail to [email protected].
License
TastyIgniter User extension is open-source software licensed under the MIT license.
More from this author
Other extensions and themes by Igniter Labs.
